Spring ContentNegotiation(内容协商)之原理篇(二)

简介

在了解这部分之前,你需要知道 Spring 都是通过 DispatcherServlet 来处理和分发请求的,如果不知道的话也不会影响到本文的阅读

在开启内容协商之后,URL 肯定是会变的,例如之前是 a/b,开启后则变成为 a/b.json 或者 a/b.xml

那么 Spring 首先第一步就需要解决如何将这个 url 映射到正确的 Controller 上的呢?

HandlerMapping

阅读更多

Spring ContentNegotiation(内容协商)之使用篇(一)

背景

随着业务系统的成熟,如果你的项目正好是公司的中台战略之一,但是下游系统的接收方式不统一,这一种情况在一些老的公司系统架构总经常出现,如果下游系统不方便兼容,那么就需要中台系统对外提供各种不同格式返回报文

内容协商

简单说就是服务提供方根据客户端所支持的格式来返回对应的报文,在 Spring 中,REST API 基本上都是以 json 格式进行返回,而如果需要一个接口即支持 json,又支持其他格式,开发和维护多套代码显然是不合理的,而 Spring 又恰好提供了该功能,那便是ContentNegotiation

在 Spring 中,决定一个数据是以 json、xml 还是 html 的方式返回有三种方式,分别如下:

阅读更多

聊一聊 SpringBoot 中的一些被忽视的注解

之前在老的项目中看到了一个比较有趣的现象

有一个需求是需要对返回的数据进行加解密的操作,部分老代码是直接硬编码在项目中,但是后来有人改了一版,称之为 1.0 版本

1.0 版本是通过切面配合注解进行处理,大致的处理流程是对返回的对象通过反射遍历字段,如果发现字段上有指定的注解,则进行加密操作,如果发现该字段是一个对象的话,则进行递归处理,直至结束

后来有一个需求是对返回的手机号、身份证信息只需要对中间的信息进行加密,两边不处理…其他的例如家庭地址、家庭成员全部加密为密文

拿到这个需求的时候,想改也挺简单,只需要增加一个新的注解,然后替换该切面扫描到的返回值进行替换注解就可以了

阅读更多

Springboot自定义@EnableXX注解

在SpringBoot中,经常可以看到许多以 @Enable 开头的注解,例如:@EnableAutoConfiguration@EnableAsync……,那么我们是否可以自己定义一个注解呢?

其实自定义注解最终都是利用到了 ImportBeanDefinitionRegistrar 这个类,通过手动的方式,将一个类注册成为 Bean,然后在进行一系列的操作,下面就来看下 ImportBeanDefinitionRegistrar

ImportBeanDefinitionRegistrar

这个类的代码如下:

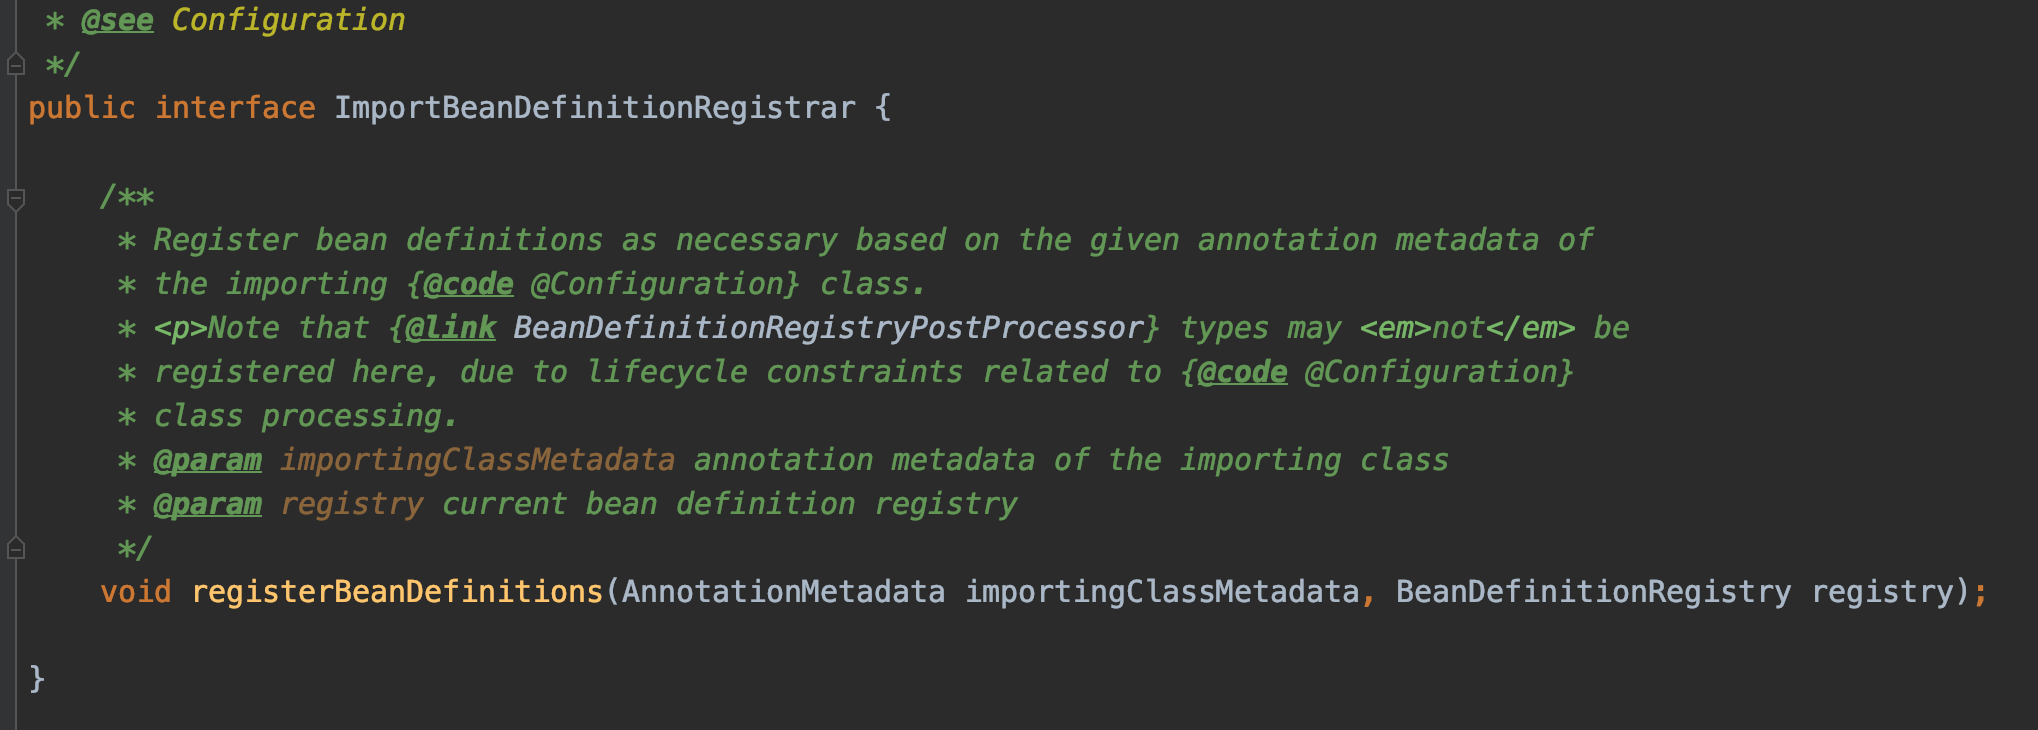
可以看到这个类的结构很简单,就是一个方法,那么下面来看下这两个参数是什么意思。

阅读更多

Springboot的maven间接依赖

在项目中经常使用 maven 来管理项目,但是有时候对于 maven 的细节还是了解的不是很清楚,因此今天复习下。

maven项目

首先开始建立一个最简单的 maven 项目,其配置如下图:

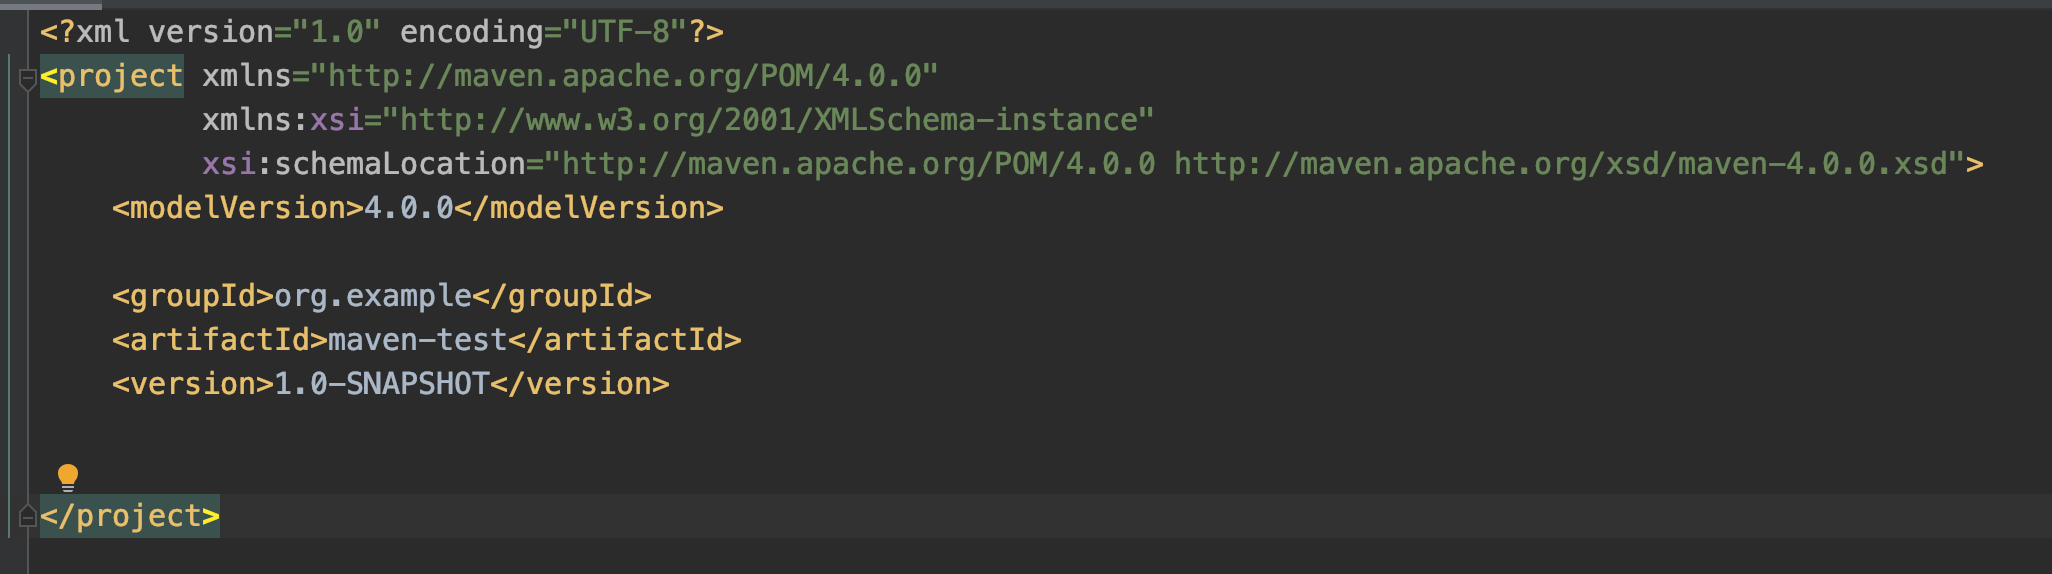
可以看到最上面一行是 xml 的文件描述符,然后再是 project,在这里引入 xsd 文件。

XSD(XML Schemas Definition)XML Schema,描述了 xml 文档的结构,用于判断其是否符合 xml 的格式要求

阅读更多

SpringBoot中异步线程的处理

在工作或者学习的时候,我们都会接触到异步编程,大多数情况下都是通过新建一个线程池,然后调用submit方法或者execute方法来执行。如下:

1
2
3
4
5
6
7
8
9
10
11
12
13
14
15
16
17
public void simpleThreadPool(){
ExecutorService executor = new ThreadPoolExecutor(4,5,0, TimeUnit.SECONDS,new LinkedBlockingDeque<Runnable>());
executor.execute(new Runnable() {
@Override
public void run() {
System.out.println("run");
}
});
Callable<String> callable = new Callable<String>() {
@Override
public String call() throws Exception {
return "callable";
}
};
Future future = executor.submit(callable);
System.out.println(future.get());
}

在Springboot中其实也可以这样做,但是不利于后期的维护,加入后期需要把 runable 的方法修改为同步类型的,那么此时就需要大量的改动代码,如果说很多地方都用到的了的话,就会很容易漏掉了一处导致bug的产生。

Spring的解决方法

不需要返回值的异步

阅读更多

springboot多数据源-sqlSessionFactory

在SpringBoot中,动态的切换数据源的方式有两种,一种是通过AbstractRoutingDataSource来通过注解实现,另一种则是通过配置不同的SqlSessionFactory来读取不同文件夹的mapper,从而实现多数据源。
代码如下:

DataSourceOneConfig

1
2
3
4
5
6
7
8
9
10
11
12
13
14
15
16
17
18
19
20
21
22
23
24
25
26
27
28
29
30
31
32
33
34
@Configuration
@MapperScan(basePackages = {"xyz.somersames.dao.one"} ,sqlSessionTemplateRef = "dataSourceOneSqlSessionTemplate")
public class DataSourceOneConfig {

@Primary
@Bean(name = "dataSourceOneT")
// 这里后面加一个T是防止Spring出现skiped mapperFactoryBean 错误,导致无法注入
@ConfigurationProperties(prefix = "spring.datasource.one")
public DataSource getDataSource(){
return new DruidDataSource();
}

@Primary
@Bean(name = "dataSourceOneSqlSessionFactory")
public SqlSessionFactory setSqlSessionFactory(@Qualifier("dataSourceOneT") DataSource dataSource) throws Exception {
SqlSessionFactoryBean bean = new SqlSessionFactoryBean();
bean.setDataSource(dataSource);
bean.setMapperLocations(new PathMatchingResourcePatternResolver().getResources("classpath:mapper/one/*.xml"));
return bean.getObject();
}

@Primary
@Bean(name = "dataSourceOneTransactionManager")
public DataSourceTransactionManager setTransactionManager(@Qualifier("dataSourceOneT") DataSource dataSource) {
return new DataSourceTransactionManager(dataSource);
}

@Primary
@Bean(name = "dataSourceOneSqlSessionTemplate")
public SqlSessionTemplate setSqlSessionTemplate(@Qualifier("dataSourceOneSqlSessionFactory") SqlSessionFactory sqlSessionFactory) throws Exception {
return new SqlSessionTemplate(sqlSessionFactory);
}
}

DataSourceTwoConfig

1
2
3
4
5
6
7
8
9
10
11
12
13
14
15
16
17
18
19
20
21
22
23
24
25
26
27
28
29
30
@Configuration
@MapperScan(basePackages = {"xyz.somersames.dao.two"} ,sqlSessionTemplateRef = "dataSourceTwoSqlSessionTemplate")
public class DataSourceTwoConfig {

@Bean(name = "dataSourceTwoT")
// 这里后面加一个T是防止Spring出现skiped mapperFactoryBean 错误,导致无法注入
@ConfigurationProperties(prefix = "spring.datasource.two")
public DataSource getDataSource(){
return new DruidDataSource();
}

@Bean(name = "dataSourceTwoSqlSessionFactory")
public SqlSessionFactory setSqlSessionFactory(@Qualifier("dataSourceTwoT") DataSource dataSource) throws Exception {
SqlSessionFactoryBean bean = new SqlSessionFactoryBean();
bean.setDataSource(dataSource);
bean.setMapperLocations(new PathMatchingResourcePatternResolver().getResources("classpath:mapper/two/*.xml"));
return bean.getObject();
}

@Bean(name = "dataSourceTwoTransactionManager")
public DataSourceTransactionManager setTransactionManager(@Qualifier("dataSourceTwoT") DataSource dataSource) {
return new DataSourceTransactionManager(dataSource);
}

@Bean(name = "dataSourceTwoSqlSessionTemplate")
public SqlSessionTemplate setSqlSessionTemplate(@Qualifier("dataSourceTwoSqlSessionFactory") SqlSessionFactory sqlSessionFactory) throws Exception {
return new SqlSessionTemplate(sqlSessionFactory);
}
}

阅读更多

SpringBoot2.x是怎样只初始化LettuceConnectionFactory的呢

SpringBoot1.5使用Redis和2.x的区别

在 SpringBoot1.5 的版本的时候,如果要创建一个 RedisTemplate 的话,那么可以直接使用如下代码:

1
2
3
4
5
6
7
@Bean
public RedisTemplate<String,Object> redisTemplate(JedisConnectionFactory jedisConnectionFactory){
RedisTemplate<String,Object> redisTemplate = new RedisTemplate<>();
redisTemplate.setConnectionFactory(jedisConnectionFactory);
// 添加序列化代码
return redisTemplate;
}

然后在业务类中直接通过 @Autowired 注解来调用 redisTemplate,但是如果将 SpringBoot1.5 升级到 2.0 之后,你会发现这样写的话,SpringBoot 启动的时候会报错。报错内容如下:

1
2
3
4
5
The following candidates were found but could not be injected:
- Bean method 'redisConnectionFactory' in 'JedisConnectionConfiguration' not loaded because @ConditionalOnBean (types: org.springframework.data.redis.connection.RedisConnectionFactory; SearchStrategy: all) found beans of type 'org.springframework.data.redis.connection.RedisConnectionFactory' redisConnectionFactory

Consider revisiting the entries above or defining a bean of type 'org.springframework.data.redis.connection.jedis.JedisConnectionFactory' in your configuration.

阅读更多

Spring中AOP的探索与实践(二)之Mongo多数据源切换

在之前的一片文章中介绍了使用AOP的方式来实现Redis的多数据源切换。而今天这一篇则是主要讲述Mongo的多数据源切换。

使用AOP来实现Mongo的数据源切换与Redis的AOP切换相同,不同之处是需要替换MongoRepository里面的MongoOperations,从而实现多数据源的切换

代码示例

配置类,读取Mongo的配置

1
2
3
4
5
6
7
8
9
10
11
12
13
14
15
16
17
18
19
20
21
@Configuration
public class MongoMultiProperties {

private static final Logger LOGGER = LoggerFactory.getLogger(MongoMultiProperties.class);

@Bean(name="mongodb1")
@Primary
@ConfigurationProperties(prefix = "spring.data.mongodb.db1")
public MongoProperties db1Properties(){
LOGGER.info("正在初始化db1");
return new MongoProperties();
}

@Bean(name = "mongodb2")
@ConfigurationProperties(prefix = "spring.data.mongodb.db2")
public MongoProperties db2Properties(){
LOGGER.info("正在初始化db2");
return new MongoProperties();
}

}
阅读更多

Spring中AOP的探索与实践(一)之Redis多数据源切换

一般在项目的使用过程中,有时候为了减轻数据库的压力,从而将一部分数据缓存至Redis,但是随着业务量的增多。我们所需要的Redis服务器也会越来越多,就算不需要多个Redis数据源,那么在一个redis里面,切换不同的DB也是很麻烦的一件事情。

非AOP的一般的多数据源操作

在Redis的多数据源使用中,一般的方法是从配置文件中读取多个RedisProperties,读取到配置文件之后,将RedisProperties配置到RedisTemplate,然后每次使用的时候就通过不同的Template来调用Redis服务器。示例如下:

代码示例

Redis的配置类

阅读更多